Thursday, October 13, 2011

Sock Monkey Hat

Sock Monkeys are taking over the world! Well at least the hats are taking over Etsy. I went to look at the sock monkey hats for sale on Etsy just to see how my crocheting skills measured up and there were 52 pages of listings. Yes, you read that right. Not just 52 listings but 52 pages. Crazy. There's probably stuff that has more listings, but in my mind 52 pages of sock monkey hats is kind of extreme.

So, how did I get started making sock monkey hats you ask? Well, my friend, Crystal, asked if she bought a pattern, would I make her son a hat. I told her if she bought the pattern and the materials and it turned out - the hat was her's if she let me keep the pattern. It's been the best deal ever. She bought the pattern from Beezy Mom's Creations, on Etsy (see - I was right, sock monkeys are taking over the world; the 52 pages was just for sock monkey hats already made but add in the patterns as well and things get kind of scary - aaaagggghhhhh!) It was so cute and I was so excited to get started on it that I didn't even wait for her to get me the stuff. I used some yarn that I bought for another project that didn't really work out. The pattern was super easy to follow and each one has come together a little faster. A few more details after the pics. Again, thank you to Brittany for some awesome photos!

Okay, so a couple of things about this hat. Either I crochet really tight or the pattern runs really small. But either way, no worries. It's really easy to make beanie hats like this bigger. The hat shown in the pictures was the 1-4 yr old pattern but is being worn by an infant. So really check your sizes on this one. After making the monkey hat from this pattern, I found another site, Easy Make Me Happy, that has a pattern for a monkey hat for free! It's not a sock monkey hat but can easily be turned into one. The thing I like about the free pattern is the coverage the ear flaps give. And the pattern seem to fit a little more true to size. But I love, love, love the ears and the sock monkey mouth on the pattern from Beezy Mom's Creations. This pattern even comes with a pattern for a flower that you can attach if you want. So, I took the parts I liked about both patterns and combined them together. If you crochet at all, totally check out these two sites. Easy has some free patterns and others you can buy on Etsy. Beezy, as far as I can tell, just has patterns on her Etsy shop. She even has a deal where you can buy 3 or 6 patterns together and get a discount. Score! You will not have a hard time finding way more than 6 patterns that you love.

Again, if you love what you see and want one but don't know how to crochet, let me know and we can work something out. With winter right around the corner, we have to keep those head warm! I can even make them for adults - with or without the mouth and ears :).

Monday, October 10, 2011

Halloween Centerpiece

I'm back! I hope you like the leg warmers. I was at Joann's today forcing myself to not buy more sock yarn. I need a baby girl. Someday. Anyway, I have some other fun crochet stuff to post, but today I am going with a Halloween theme instead. Centerpieces are fun, but when they are yummy too, even better. I'll post the pic then talk about it after.

I first saw this on my friend's facebook page. I linked to the tutorial on See Jane Blog and knew I had to make one. Well, it's not really a tutorial, more like a "here's what to buy". There was enough info that I could figure it out. And I found out during the process that Michael's and Joann's are much more expensive in Logan. Holy moly. Prices were out of control. Let's just say I spent more than the $20 the original post said she spent. And, I think every one in Cache Valley must have seen this same tutorial because I had to go to 4 different stores to collect all the necessary items. With all those stores, I still didn't spell "boo" like I wanted to, I had to go with "eek". Oh well, it's still cute.

If I were to do this again, I would use spray paint instead of craft paint. I just think it would have given it a nicer finish. And the glue I used to attach the glass to the candlestick ended up not working out too well so I re-glued with Krazy Glue. Even though the upfront cost was a little much, I'm sure I will get more use out of this centerpiece than just the month of October. Letters and ribbon can be easily changed to fit the season, ie joy, eat, xox, etc. What other three letter words can you think of to change it for the holiday?

Another thanks to Brittany again for the photo. Also, if you want the candy to last any amount of time, make sure you get candy your family doesn't like. Josh ate all the candy bars, Benj ate nothing but candy corn all day long and I finished off the peanut butter m and ms. Maybe next holiday I'll fill it with something non-edible.

Thursday, October 6, 2011

Baby Leg Warmers

I'm back! I know it's been forever since I've posted, but I've been busy making all sorts of fun stuff and finding lots more stuff I want to make. And, I was feeling a little "meh" about my crappy photos so I didn't really have a desire to post. But that has all changed since my super awesome and amazing friend, Brittany, came over and did a photo shoot with her mad skills. Now my stuff looks so great I want to post about everything today. But I won't. I will spread it out over the next little while until I can convince Brittany to come and take some more pics for me!

Okay, enough of that - on to the stuff. I decided to post the baby leg warmers first. I had so much fun making them and couldn't get over how seriously cute they look on. I had them sitting with all my crocheting stuff and I would shove them in everyone's face as soon as they walked in my door so they could tell me they were cute too. But when they were put on the cutest little model with a pair of jeggings - wow - it doesn't get much cuter than this. Okay, so here are the pics so you don't have to take my word for it.


The pattern was taken from the book Little Crochet by Linda Permann. I posted about the booties also from this book here. This pattern was a little more complex with the stitches used, but once I read the pattern a couple of times, it wasn't that bad. There are a lot of little stitches to make it around one round so I would definitely suggest using a stitch marker so you don't have to count every little stitch. The thing I liked most about this pattern was a little side note that explained how to make larger sizes than the ones in the pattern. While this cute little model fit into the pattern size, it would be fun to make bigger ones and all the guess work has been taken out.

Was I not right? Way too cute. I have decided I am going to start selling things that I've made. I will only do custom orders, so if you are interested in anything that you've seen on the blog so far, send me an e-mail at emmaheare@gmail.com and we can talk about pricing. And specifically, if there is a crocheted item out there that you would love to have, but you don't know how to crochet, let me know and we can talk about that as well. This is really in the beginning stages right now while I work out all the details. Hopefully soon it will be more official on the site.

Stay tuned in the next couple of days for some more fun links to tutorials. And I'm thinking another giveaway in the next few weeks!

Thursday, August 11, 2011

Winner!

Congrats to commenter number 5!
brossettelewis said... 5

I need that! I'm a more for fashion scarf person but I live in Utah so I guess it gets to the NEED point about October. I'll claim both.:)

You are the big winner of a crocheted ruffled scarf! E-mail me at emmaheare@gmail.com so we can choose a color for your scarf and I can get it sent off to you.
Keep checking back for links to more tutorials.

Tuesday, August 9, 2011

Little Boy Tie

I've seen a lot of posts for ties but have been really hesitant to make one. They look pretty complicated and some patterns were like a million pages long it seemed like. Then I found a tutorial on Lil Blue Boo that I felt pretty confident I could handle. And guess what? I did! It took a little time but it wasn't that hard at all. The tutorial says it's a toddler tie but mine came out a little bigger than toddler size. Take a look for yourself.It's not horribly large but definitely on the large side. I originally was going to make it for my toddler. When it came out so big, I figured it would be perfect for my six year old. I had to bribe him to even try it on - he's stubborn just like me. He wouldn't wear it, so back to Benj it went - he'll grow into it eventually.

The pattern for the tutorial is pretty cool since you can make it an actual tie that you tie or one with elastic. And like I said before, very simple to follow. The best part - you can make it with a fat quarter! A lot of other patterns I looked at had you cut on the bias, but not this one. So, when fat quarters go on sale, this tie can be made super cheap. I am going to try another one but this time I am going to scale down the pattern just a bit to see if it comes out a little smaller. I'll let you know how it works out. Happy tie making!

Remember, giveaway deadline is tomorrow at 11:59pm mountain time so check out the crocheted ruffled scarf and enter to win one in the color of your choice. There are so many ways you can wear this scarf, it's a must have accessory. Check it out!

Friday, August 5, 2011

Another Ruffled Scarf - Giveaway Style

This giveaway is now closed. Check out other posts for links to awesome tutorials and check back later for more giveaways!

Wow - this is getting out late. The whole reason I pushed back until today was so I could have my super cute niece model for me and I never got around to calling her. Sorry, you'll have to suffer through the pictures I took this afternoon. I am so not a photographer.

Anyway, this tutorial comes from Aesthetic Nest again. I posted another tutorial from this site, my first project on this site in fact, the cloche (or baby hat). So if you want to see some really good pictures of what this scarf looks like, check out the full tutorial with her pictures - they are much, much better than mine. Anyway, enough talking about the pictures, here they are.

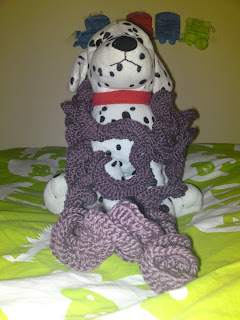
As the hanger and the dog model so well, you can see that this scarf can be worn multiple ways. And it's super ruffly. Fun, fun. I am so not kidding when I say this is about as easy as it gets when it comes to crocheting - a big ol' chain and lots of double crochets. Even if you don't know how to double crochet, she has lots of great step by step pictures to get you through it. Still don't want to make one for yourself? Not a problem because it's giveaway time!

The winner of this giveaway will get a super ruffly scarf, made by me, in the color of your choice - limited only by what colors they have in stock at Hobby Lobby. So how do you enter? Easy, just leave a comment on this post telling me if you are a "scarves keep you warm" kind of person or "scarves are a fashion statement" kind of person. I used to be a "keep you warm" but I'm starting to lean to the the "fashion statement" side of things. (Only one comment per person please - multiple comments will be deleted.) Hurry and enter before Wednesday, 10 August because that's when the giveaway will end, at 11:59pm. One comment will be selected at random and will be announced on the blog the 11th of August. I will then contact you to get your color choice. Happy commenting and good luck!

Wednesday, August 3, 2011

Tote Bag

No giveaway today. Sorry. I want to get a better picture, so I think I will ask my niece to model for me. So check back on Friday for the tutorial, pics, and instructions for entering!

Today's post is for a cute little tote bag with an applique on the front. You could leave it blank if you wanted, but I think the applique gives it that something extra and personalizes it a bit. The tutorial comes from Craft Snob and was part of a 4-part sewing basics series. I made one other thing from the series which I will post about later. This tutorial was so easy to follow, I am going to make a few more of these bags. It did take me a kind of long time to make though, only because I went a little crazy on the appliques. I needed lots of practice so I figured this project was as good as any. Okay, pictures and then I'll tell you a little more about it.


Number one thing I love about this tote, it's reversible! Wahoo! Who doesn't love a reversible bag? And with it being so easy to make, even better. In the tutorial, Wonder Under was used to attach the applique before sewing. I didn't have any and I really don't like the stuff either, so I just used some fabric adhesive which I had on hand. Worked like a charm. I also made mine a tiny bit bigger than the original tutorial. I am planning on making at least two more bags and using them as library book totes and some of those picture books are big. I'm done carrying all the books home from the library. I am going to applique the boys names on the front so they each have their own to carry their books. I'm kind of excited about them. I'll post pics of the boys bags when they are done. Last thing about my bag - I thought about it after I was all done appliqueing, but since it's a library bag, it would have been cute to put "live laugh read". Oh well, I was not about to unpick all that stitching.

Happy tote bag making and make sure to check back on Friday for the next giveaway!

Tuesday, August 2, 2011

Make-up Brush Case

So I was going to post yesterday but obviously I didn't. 1 - because I didn't take a picture of the project I wanted to post about while my son was wearing it and 2 - I spent practically the whole day trying to recover from the huge mess I left in my other son's room getting ready for the yard sale we had this past Saturday. But I'm back and I have something different to post.

I made this case fairly soon after I had started sewing and I didn't have too many problems figuring it out. It is very customizable for whatever size brushes you have in your make-up collection. I found this tutorial at The Sewing Republic. They have lots of great tutorials! The creator of this tutorial is from Chickpea Sewing Studio. It's really nice to have a place to keep my brushes away from all the other junk that is in my bathroom. Especially since I spent way too much on them. Anyway, here's how mine turned out.

I changed a few things. Most obvious was the shape of the case. I can barely bind a straight corner, let alone a curved one so straight it was. She also had a magnetic snap on hers. It looked a little too complicated for me so I was going to put a button and elastic to keep it closed. I put the elastic in but never got around to the button part. It stays closed on its own so I wasn't ever too worried about finishing it. You can use this same idea to hold other things as well like knitting needles, crochet hooks, or other such stuff. There are a lot of tutorials like this one that hold crayons or colored pencils. This one is different in that it has a stiff interfacing in it to hold its shape. Anyway, enough rambling. Have fun making your own make-up brush case.

I'm thinking another giveaway is in order. So look for either tomorrow or Friday!

Friday, July 29, 2011

Sensory Bags

I had another baby shower to go to and I wanted to make something for it. I made a couple pairs of booties like in this post and some matching beanies. (I will post pictures of those later.) But I really wanted to make something else, so sensory bags it was.

I have made bean bags before on my own with appliques, but this tutorial on Sew Like My Mom had little ribbon tags on them which added that little something extra. She appliqued letters on the bags for the child's name. I did one set with a name and another set with shapes. For the filler, the original tutorial used split peas. I figured with babies sucking on these things, I don't want anything sprouting or getting moldy. So I opted for something different. I used a few different things. Some have just polyester stuffing and some have an added jingle bell in with the stuffing for a nice little sound when shaken. Other bags have a grocery store bag stuffed inside. This gives a different texture when pressed and a nice crinkly sound as well. I also used some plastic pellets that you can get at craft stores. Those make for a heavier sensory bag. I have also tried to find the squeakers that come in squeaky toys to put in one, but no luck at the stores. I have only checked a couple of places so I will have to check more. I have found some online really cheap but I don't want to pay the over $7 shipping. If you know where I can get any locally, please let me know!

Okay, on to the pictures. The first set I made for a little girl. I spelled out her name, one letter on each bag. I used a zig-zag stitch for the applique and I ended up not really liking it, so I changed the stitch on the next set. (Probably because I am not very good at it.) This set had 3 ribbons on each side of the bag, like the original tutorial and I used good old cotton fabric on both sides.

For the next set, I changed things up a bit. I used some leftover flannel that I had for the front and then used the soft minky fabric on the back. And if you look really close, I changed the stitching around the applique to a blanket stitch. I like this one so much better and it was way easier to go around corners and curves and not look all wonky. I also cut down on the ribbons, just two per side and some I didn't put any ribbons on. It kind of sounded like people liked the ones with the ribbons more at the baby shower, so I will stick with the ribbons next time.

So there you have it. A super easy project that uses up some scrap fabric and ribbon and make a great gift at the same time. And just a side note, I have no idea why this is making a link and no idea to where is linking. I just checked - it links to a big old picture of the sensory bag so no worries!

Thursday, July 28, 2011

We Have a Winner! and a Bookmark

And the winner of the first giveaway is Anita! Congratulations! Message me your address on Facebook and I will send the towels off. I will have another giveaway next week so check back.

Okay, on to the bookmark. I found this tutorial for a scented bookmark and I thought I would make some for the ladies in my book club. That didn't happen, I only made one. Maybe eventually. I just find other things that catch my attention. I have ADD when it comes to projects.

This tutorial comes from The Sewing Republic. Pretty simple, although with the decorative stitching, it was a little annoying to get the interfacing in. I didn't put any scent on mine. The book I am reading now is borrowed from a friend and you never know how people react to their things coming back smelling differently. Anyway, here's how mine turned out.

Just a quick little project that is useful. Well, so is a scrap piece of paper, but this is more fun. And I got to use the decorative stitching on my machine. I have a few more things I've been working on so check back soon for links to more tutorials.

Tuesday, July 26, 2011

Not Your Regular Old Bib

It's a bapron! What's a bapron? It's a baby bib that's big enough to pass for an apron. It think the creator of this tutorial, Jess, coined the term. Most baby bibs are so dang little that they are only good for when they are being spoon fed by someone and they sit super still and don't have flailing arms. What baby is like that? None. So enter the bapron. I like it because it goes up high on the chest and protects the mid section from flying food.

Okay, so on to the tutorial. It can be found on Craftiness is not Optional. She has tons of other tutorials as well. A lot of them are some cute clothes for little girls. But, since I don't have girls (longing sigh), I have only made the bapron so far. And here's how mine turned out.

Benj was not too happy when I first put it on. He hasn't worn a bib for a while since, like I said earlier, the other ones we've had are pretty much useless at this stage. He wasn't too messy with this meal, but you can see in the second picture, the bapron did it's job. No spaghetti on the clothes! And the second time around using it, he was much happier.

Benj is a couple of months away from being two and a half years old and it's a little snug. But if you started using these at the beginning of the self-feeding stage, you can get a lot of use out of them. I might try to make another one of these, tweaking the pattern a little to make it bigger and see how it turns out. I also need some more practice binding. Ugh! - binding.

So have fun making your very own bapron! And remember, giveaway entry deadline is tomorrow. There are not a lot of entries so your chances are good.

Sunday, July 24, 2011

Changing Pad and Diaper Pouch

Brieann - this one's for you! My sister-in-law asked if I would tell her where I got the tutorial for the diaper pouch I use for my two-year-old so I figure I would put it here so others can enjoy as well.

Once our kids got out of the baby, baby stage, they didn't need the "nursery in a bag" brought along on every outing. A diaper and some wipes in the purse would work, but if your purse is anything like mine, there were likely going to be some crumbs or old gum wrappers mixed. And I could never rely on there being a disposable changing pad in public restrooms. So I searched the internet for a tutorial. I found one that looked pretty cute so I made it. But a couple weeks later I found one that I loved. So I made that one as well and I am never using anything else.

I found the tutorial at Bugglebee Handmade. The thing I like about this one is that if you just need a diaper or some wipes, you don't have to open up the changing pad to get to it. Most tutorials you find are the tri-fold type where the changing pad is attached to the pocket where you keep the diapers and wipes. Not so with this one. The changing pad is in a separate pocket. Let me say again I love, love, love this one. Well, let me say I love the idea of it - this was only my second attempt at binding (I hate binding) and my first attempt at double sided fusible lining. I need a whole lot more practice. Mine may not look all that great, but it sure is functional and I use it all the time. Take a look for yourself.

So there you have it. If you don't have any diaper wearing kids, this makes a great baby shower gift. Hopefully this time next year I won't have to use this anymore, but until then, I won't leave home without it.

Wednesday, July 20, 2011

As Promised - My First Giveaway

This giveaway is now closed. Congratulations to Anita! Thanks to everyone that entered. Check back soon for the next giveaway.

It's here! My first giveaway. I must admit, I'm kind of excited. I actually had the project all made on Monday but have waited until today to actually post. This project is so easy, so useful and makes a great gift. I've given them as a Mother's Day gift, birthday gift and a "thanks for having us to dinner" gift. I have yet to make any for myself to keep, so I think I'm going to tell the hubs to enter the giveaway in hopes he'll win. Just kidding.

So what we have is a set of four, yes four, ribbon accented kitchen towels. This project comes from Sew4Home. I love this site. They have so many tutorials that I could keep this blog going for months with just their site. They also have links to other great sites that sell fabric. When I am independently wealthy, I will buy all my favorite fabrics from their recommended sites. But for now I'll just have to look.


After searching way too many stores, I finally found these at a great price of 2 towels for $3 at Walmart. Wahoo! They are nice and thick and super absorbent (or so I have been told). The tutorial had you do all sorts of measurements to make sure all the ribbons and fabric were lined up exactly so on each towel. I just eyeballed everything and you can't tell unless you look real close. So if things not lining up perfectly bothers you, don't look too close.

Okay, on to how to enter. You can enter three ways with this giveaway.
1. Become a follower of this blog. Once you are following, leave a comment that you are following. If you are already following, just leave a comment that you are.
2. Post a link to this giveaway from your blog and leave a comment that you did so.
3. Post a link from a social networking site about this giveaway, like Facebook or Google+ and once again, leave a comment that you did so.

Other rules and stuff. A winner will be chosen at random from all eligible comments left by Wednesday, July 27th at 11:59pm mountain time (is it standard or daylight savings now?) and announced on July 28th on the blog. Sorry, but at this time I will only be able to ship the towels to an address in the United States. If you are outside of the US, I will gladly send it to someone in the US for you.

So there you have it. My first giveaway. Happy entering and good luck. I have a couple more projects in mind to post about so keep checking back!

Monday, July 18, 2011

Ruffled Scarf

I made this scarf way back in March as a "hello, spring" scarf. Little did I know I would need to use it as a "winter go away" scarf for the next couple of months. I didn't think summer would ever come this year. Anyway, this was one of my first attempts at branching out in my sewing. The tutorial was pretty easy to follow with lots of great pictures. Getting the ruffles just so was a little tricky for me though. I am going to go back and try this one again come fall with a heavier material and with a little more sewing experience under my belt.

The tutorial comes from Make It and Love It. The blog has tons of cute ideas and tutorials. Check it out and explore. I'm sure you will find a few things you want to make. From here she links to Sewing Republic, which has even more project ideas from other crafters. You can find the pdf tutorial for the scarf here.

Here's how my scarf turned out.
Sorry about one of the pictures being turned sideways - blogger is being buggy with that picture. And one last thing I liked about this project. It calls for about two yards of fabric, if I remember correctly, but you don't need the entire width. So there is enough for two scarves. One for you and one for a friend. My extra fabric is still sitting in my fabric drawer though . . . .

This is the first decorative scarf I have ever owned/worn so I needed a little help with how to tie it. I googled "how to tie a scarf" and this great site by scarves.net popped up. So if you need a little help in this area, check it out.

Okay - giveaway is still on for this week. Most likely on Wednesday so check back. I'm thinking something for the kitchen.

Friday, July 15, 2011

Strawberry-Peach Jam

I originally thought this blog was going to be about crafty things like the previous post. But I got thinking about it and I decided food can be crafty too!

For a while now I've been wanting to make jam and about a month ago I roped my friend, Lucinda, into helping me. Everyone says how easy it is to make jam but I was a little nervous so help I received. And it didn't hurt that Lucinda brought over her canning pot so I didn't have to buy one. Thanks!

I got the recipe from Kraft Foods website. The website on the box of pectin led me there and it was really yummy. And easy too! I mean there was some prep work involved and I have burnt strawberry jam in my drip pan - but totally worth it. I've had way more peanut butter and jam on toast for breakfast this past month than I have for years. It's that yummy!

So here are my pics - and just remember - a food photographer I am not. Enjoy!

If you have a great recipe for jam that you love, let us know about it. My six-year-old loves the blackberry jam from Trader Joes, but since we don't have one around here and we're out, I need to make some of that next. And come back next week for a giveaway! I haven't decided what it will be yet, but it will be the first of many so tell your friends!

Wednesday, July 13, 2011

My First Real Post - Afgahn, Cloche and Booties

Alright, so after two and a half months I am finally going to actually post a project I have made. I have made lots of stuff since starting this blog and I decide I better get around to posting something. So here we go.

I have three different projects in this post. First is a baby afghan. Well, it's actually a "super-simple throw", but I made it a little smaller to be a baby afghan. And it was just that, super-simple! If you can do a single and double crochet, this project is right up your alley. Pictured below is my second one that I made.
I forgot to get a picture of the first one I made. Would it be weird to ask the person I gave it to if I could snap a photo real quick? Anyway, the pattern is so easy that I just sat in front of the boob tube during quiet time to catch up on trash tv and at night sitting next to the hubs. I used Caron Simply Soft yarn in vanilla, off white, orchid and a sagey green (i don't have the wrapper with the exact color of green). And, in case you're wondering why I used vanilla and off white, I'll tell you. I had some leftover vanilla from the first afghan I made so I used it to start the second one. Then I bought some off white, thinking it was the same color and it wasn't. Whoops! You can kind of tell but only if you look real close. And I tried to make it look like I meant it to be that way by using some more vanilla to finish it off. So, let that be a lesson to you - always check the names of your colors, even if they look the same. If you want to make this bad boy for yourself, check out Coats and Clark's website here.

Okay, on to the next project. It's a little cloche. I had no idea what that was, but after looking at the picture, I assumed it was a hat. So I made it. And it turned out rather cute if I do say so myself.
The original pattern called for 100% cotton yarn but I just used my leftover Caron Simply Soft from my afghan. The pattern was really simple and comes together very quickly. If you look closely, there's a shell edging which is way cute. The pattern seems to run a little small or maybe I just crocheted tighter than usual on the first one I made. So I used a bigger hook on this one. There are patterns for children's sizes as well and could easily be adjusted to fit an adult. Also, on the original pattern the flower was sewed to the hat. But I thought it would be cuter to make the flower detachable so you could have more options. So, I made three flowers and hot glued them to a little hair clippy. Now you can change the flowers on the hat or use them by themselves in your hair or wherever else you want a little flower. So if you want to make this cute hat, uh I mean cloche, for yourself, check out Aesthetic Nest.

Okay, last project. I had been wanting to make some booties for a while but really hadn't found a pattern I liked. But then I found an amazing book, Little Crochet by Linda Permann. I originally got the book for a sweater pattern so the booties were an added bonus. (I'll have the sweater on here when I get around to making it. It's way cute.) Here's how mine turned out.

Yup, you guessed it - leftover afghan yarn. I think that's the vanilla that made the star. Again, these booties come together way easy and they are just so cute when finished that you just want to make more and more of them. I checked out the book from my local library so check there first and then decide if you want to buy. I might actually have to have a little birdie tell my hubs that this would be a great birthday present.

So there you have it. Any of these by themselves would make a great baby shower gift or a great I'm thinking about you gift. So have fun making these cute projects and let me know how yours turn out!

Friday, April 29, 2011

New Blog

So I've caught the craft bug. I'm not very crafty in my own right. Meaning, I don't come up with ideas on my own but I can follow someone else's tutorial fairly well. I've been searching the web for fun little projects to do during quiet time and have found some pretty fun things. I've even made some of them. My bookmarks are filled with tutorials that I want to make eventually. So I figured that I should have a place to showcase my stuff. Mostly I am working on simple sewing projects and crocheting. I will link back to the original tutorial for each project so that you can totally make your own stuff too. I'm pretty excited about this blog and hope I can have some fun with it!